While looking through a Williams-Sonoma catalog, I came across the item pictured below. I really like the stars and stripes table runner, place mats and napkins.

Anytime I find something that inspires me I file it into one of my binders. I have a
wish list binder, potential
craft projects binder,
desserts and entertaining binder, and a
home décor binder. This ad was filed into my craft projects binder.
For this project I went to the local fabric store to look for a similar stars and stripes fabric. Just my luck, I found fabrics that fit the bill so I decided to make my own table runner!

I love how it turned out and enjoy using it on Memorial Day, July 4th, and anytime I want to decorate with red, white, and blue. Also, I choose a coordinating shade of red, as you can see in the picture above, to act as the back side of the runner. By choosing a color that coordinates with the red-and-white-striped trim, I have a reversible/2-sided table runner that can work for more than just patriotic events. I will use the solid red side for Christmas, Valentine's Day, or any meal where red is my accent color. You could also choose an inexpensive white fabric, or something on sale to lower the cost of this project. Either way, a table runner is a rather inexpensive project since so little fabric is needed.
I have outlined the steps I followed to create this runner. One of the best advantages to making things yourself is the cost savings potential and the satisfaction of trying something new.
First, for a table runner project I will purchase 15 inches of fabric width. In this case, I have a 15-inch wide panel of blue fabric and 1-2 yards of red-and-white-striped fabric for the trim. You will need a lot of fabric for the trim/border if you choose to create a pleated border, as I did. Also, you will need an additional 15-inch wide panel of another color of fabric to use on the opposite side of the the table runner.

Second, cut the red and white fabric into 6 inch wide panels. Then, sew all of the panels together at their ends. To sew the panels together put two panels on top of each other with the "right" sides (patterned sides) facing each other. Keep sewing the panels' ends together until you have quite a long panel of 6-inch wide fabric for the border.


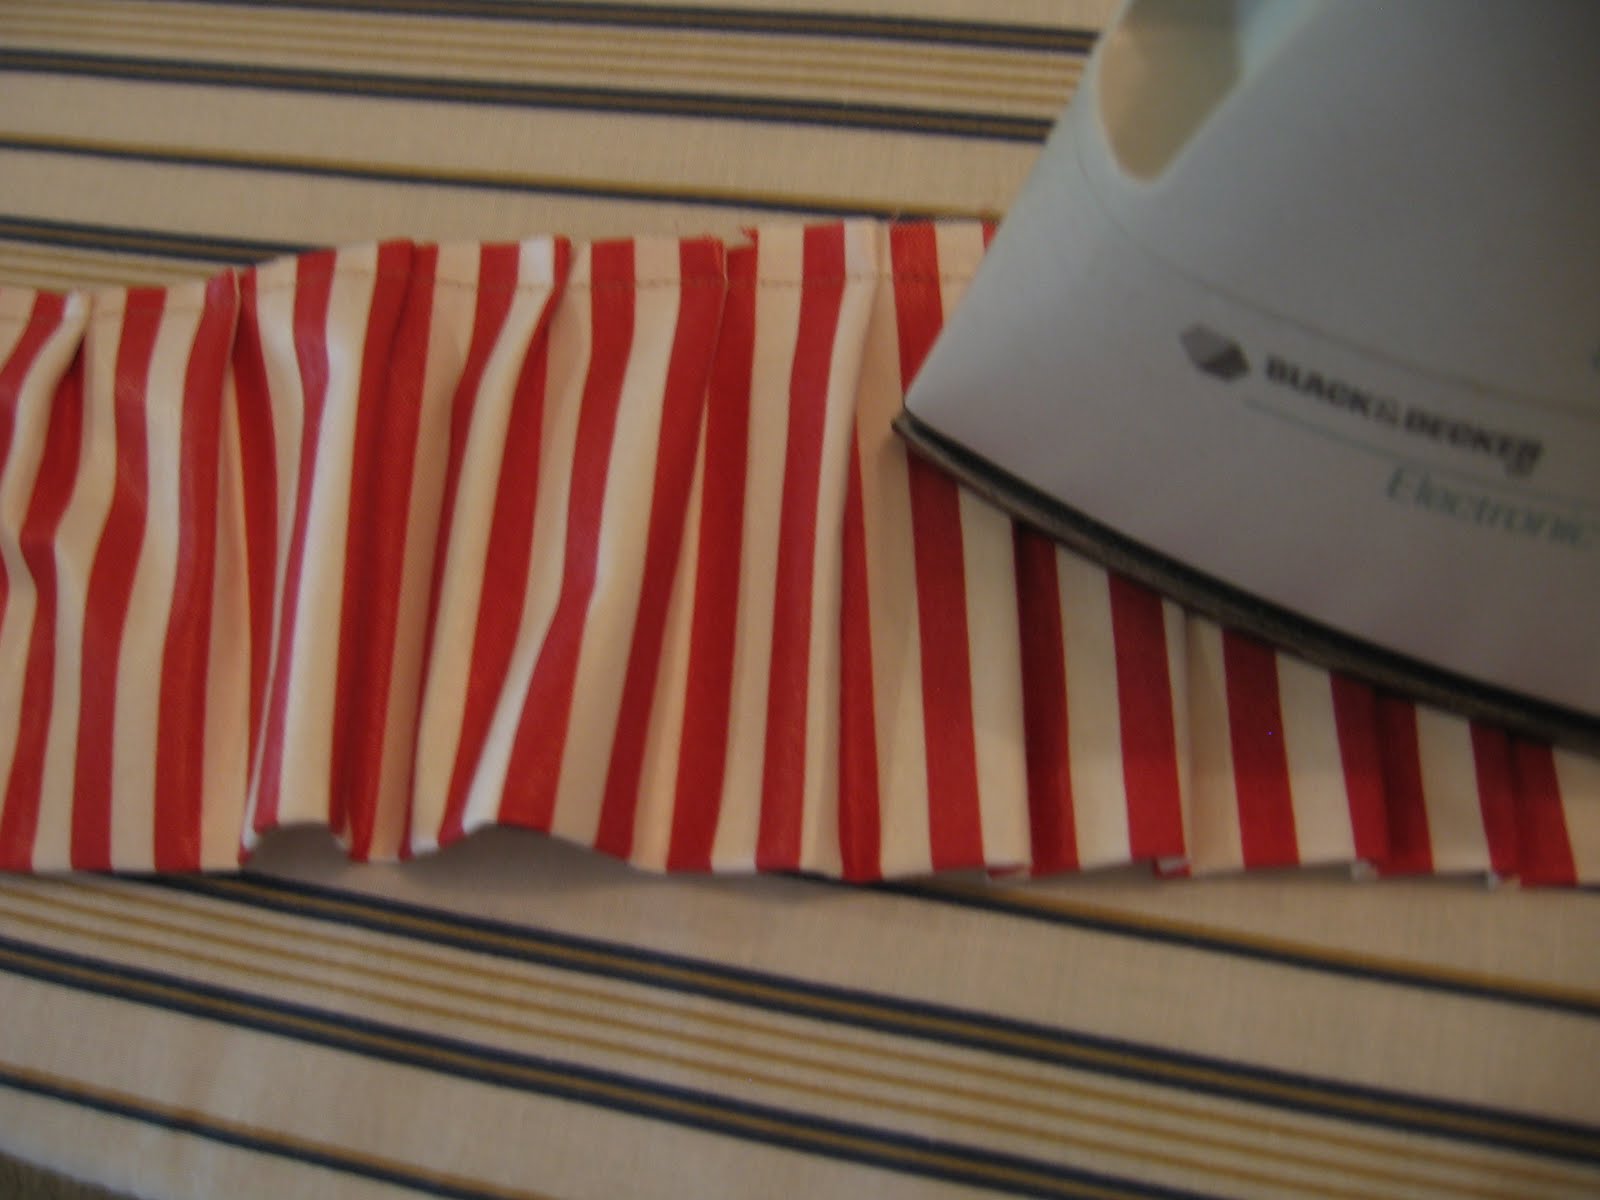
Next, iron the length of the fabric down the center. You want to iron the fabric with the "right" sides facing out.

At this point, you can choose to iron in pleats and pin them in place. Or, you can turn your sewing machine speed to low and fold in pleats just before sewing them in place. Be careful to make sure your pleats are uniform in length and depth.


After sewing the entire border of pleats I like to sew one more time down the length of the fabric to ensure that the thread line is straight and all of the pleats are equal in length/depth.

Next, iron all of the pleats down.

And then trim off the excess fabric allowance.

At this point, lay the runner fabric on a table with the "good" side face up. Then, lay the border fabric on top of it. Pin the trim to the runner around the outside edge. Allowing a small amount of seam allowance, sew the pleated border to the blue runner around the entire perimeter of the blue fabric.


After sewing all of the pleated border onto the blue fabric, you will need to use an additional complementary color of fabric. I choose a 15-inch wide panel of red fabric.
The red fabric will become the back of the table runner and in order to sew a table runner, that as a finished product as no visible thread stitching, we will need to sew it onto the blue fabric with both "good" sides facing each other. To do this, lay the blue fabric face-up with the red fabric on top of it, face-down.
Pin the fabric in place, and sew the two pieces together around the entire perimeter except for 1-2 inches or perimeter left not sewn together; this gap will be used to turn the runner inside-out so that the "good" sides of the fabric are facing out and no seams are visible.

After sewing the red fabric onto the blue, the runner should be turned inside out. To do this, reach into the gap of the not-sewn-together perimeter and pull the fabric out.

Once turned completely out, the gap needs to be sewn closed. Choose an inconspicuous shade of thread and hand-stitch the seams together.

Now the runner is finished and can be put on display!


Table runners make excellent extensions of a party theme in your decorating plans and can add a pop of color to any dining space. They can be used in the center of a dining table, along a bar or buffet table, or even folded over each dining room chair and tied to create a custom and festive chair decor. For an inexpensive but heartfelt gift, make table runners for family and friends that match the color scheme of their dining room or are intended for holiday celebrations!
Happy Early July 4th and Happy Crafting to ya!

 I used pink satin fabric to create a small table runner for the dessert bar.


